

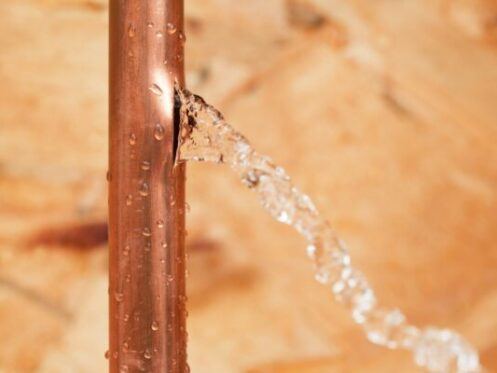
When a burst pipe floods part of your house, standing water spreads quickly. The choices you make in those first few minutes can make the difference in a bad situation and a really bad situation. Here’s what to do and what not to skip.
Kill the water, then the power
Locate the main water shut-off valve and turn it off. Do not worry about grabbing towels or rearranging furniture beforehand. The more the water runs, the more it seeps into your subfloor, drywall, and insulation.
After turning off the water, go to your electrical panel and turn off the breaker to any impacted zones. Water is a conductor of electricity. A room flooded with live outlets poses a real risk of electrocution. That’s not an exaggeration. It’s an actual, life-threatening danger. If you’re not sure which circuits power the area, turn off the main entirely. It’s not worth the risk.
Document before you touch anything
Prior to mopping anything up, document the damage. Go through the room and get images and videos of the water level, the broken pipe, any sagging drywall, damaged furniture, and wet carpet. Do this for every room. Take as many pictures as possible. Your smartphone camera is perfect for this.
This evidence will be used to file a claim with your home insurance company. They need to know the state of the property as it was before you started cleaning up. This only takes a few minutes and can save you from any unnecessary disputes.
Know what kind of water you’re dealing with
Not all burst pipe water is the same. When a supply line breaks, it discharges Category 1 water – that is, clean water not posing substantial harm to humans. This is the most common type of burst pipe occurrence and, luckily, the easiest to deal with as a homeowner.
Category 3 water, sometimes referred to as black water, is unsanitary water that comes from sources such as sewage backups, toilet overflow with feces, and floodwater that has contacted microbial contamination. If you have any doubts about whether a pipe burst has introduced water from a waste source into your home, you should immediately abandon all DIY extraction attempts and contact a professional. Black water cleanup requires protection gear and disposal procedures far beyond a simple wet/dry vacuum and some rubber gloves.
Extract standing water fast
In Category 1 circumstances, your goal is to remove the water as fast as possible. A wet/dry shop vacuum is great for getting rid of small amounts of water. When you have more than just a few inches of water, a submersible pump can come to the rescue.
Time is of the essence. Hardwood floors can begin to cup and swell within a day. Drywall becomes soft and loses its integrity as it soaks up water. The longer water sits, the more you’ll ultimately have to replace.
Work from the outer areas toward the center by pushing water into a drain or a sump pump. Remove soaked rugs and those you can’t dry out in the next 24 to 48 hours right away. They will only add to the moist conditions on the floor.
Drying the surface isn’t enough
This is where most DIY recoveries fall short. Extracting visible standing water is step one, but the water you can’t see is the real problem. Drywall wicks moisture up and inward. Subfloors trap water between layers. Wall cavities hold humidity for days. Running a standard box fan for 48 hours won’t reach any of that.
Mold can begin covering damp surfaces within 24 to 48 hours of initial water exposure (FEMA), and it doesn’t need visible water to get started – it just needs moisture content above a threshold that surface-level drying can’t reliably control.
Industrial-grade dehumidifiers pull moisture out of the air and, critically, out of porous building materials in a way that consumer equipment doesn’t. Combined with high-velocity air movers positioned to direct airflow across wet surfaces, they work together to drive relative humidity below 60% – the point at which mold spores generally can’t establish growth.
For structural drying that goes beyond surface moisture, professional water damage restoration Pomona, CA technicians use moisture meters and thermal imaging cameras to find hidden wet zones in walls and subfloors that look dry to the eye but aren’t. That level of detection isn’t something you can replicate with a hand on the wall.
Signs you need professional help
Contact a restoration contractor right away if you notice drywall that is sagging or feels soft to the touch, a musty smell occurring within the first day, flooring that is buckling or seams separating, or water that entered wall cavities or below-slab areas.
A slab leak – a pipe burst beneath a concrete foundation – is a specific scenario where restoration equipment is truly the only feasible choice. The detection requires the use of special equipment, and the concrete drying process is measured in days with very precise psychrometric monitoring.
Getting the home fully dry
Structural drying is not complete until the building materials (studs, joists, subfloor panels, drywall backing) have returned to their pre-loss moisture content. This is documented through drying logs and daily readings from multiple points of measurement. This information is also invaluable in the insurance context to verify that your claim is for a complete, professional, and measured restoration of the affected area.
A burst pipe won’t break the bank. The secondary damage from an incomplete restoration (rot, mold, compromised framing) often will. Be there fast, be there first, be there prepared. Document, extract, and, if the water has gotten beyond your ability to pull it free, dry it out professionally.